Do you use BIM 360 and AutoCAD products? Do you have the Autodesk Desktop Connector installed? If so, there is a new update. This may not be news to you as there are frequent updates, but this one is somewhat unique. Please read on.
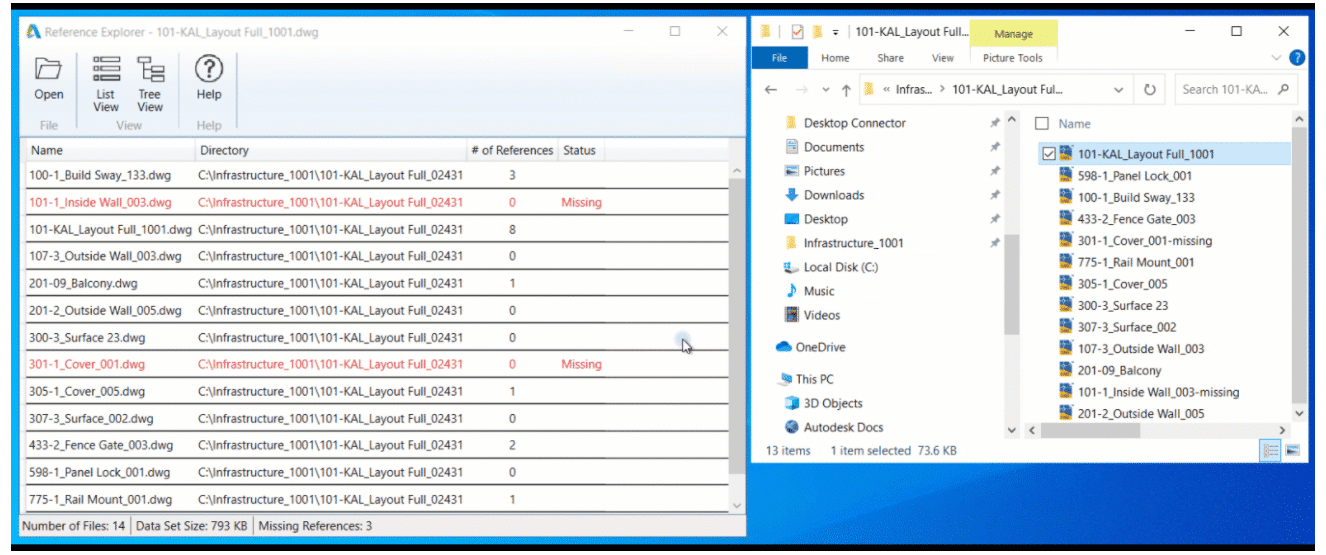
The new Reference Explorer provides the ability to visualize all files in a dataset as well as the relationships between the files before or after uploading to the cloud.
Resolved Issues:
DST files will not open, and content is incomplete after the DST file is saved to the workspace, or when synced from the cloud.
Increased the number of concurrent files in download workflows to increase performance.
Fixes, and of course new features are included with this update. Here are the release notes. Read on to discover what’s new.
Fixes
There have been many defect fixes and you can read about them here. The one notable item I’ll describe here is about feature lines. Some users have experiences them magically disappearing from some drawings. Here is an excerpt form the documentation:
“Errors that will lead to missing feature line issue are automatically detected and fixed when opening a drawing. This operation will only run when Civil 3D detects a potential error in the drawing.”
Use the Insert Points at Crossing Locations command to insert PIs or elevation points on crossing feature lines in the same site.
Use the Set Grade/Slope Across Feature Lines command to edit the grade or slope between vertices on two or more intersecting feature lines.
Use the Set Corridor Baseline Elevation by Reference command to set the elevation of a point on a feature-line-based corridor at a given grade or slope from a specified location. This command adjusts the elevation of the corresponding PI on the corridor baseline accordingly.
Autodesk Collaboration (BIM 360):
Support has been added for reference templates and sheet set data files.
ArcGIS:
Refresh an ArcGIS dataset in your drawing so that it matches the ArcGIS dataset online and add new Civil 3D objects to ArcGIS.
Pipe Networks:
Gravity network analysis has 2 new settings:
Pipe Length Type which you can use to specify the pipe length type to use for the analysis calculations.
Conservative Travel Time that you can use to specify whether the minimum velocity or the calculated design velocity will be used to calculate the pipe section time if the design velocity is smaller than the minimum velocity.
Do you use more than one CTB file when printing in AutoCAD? More than 10? 40? What if I said you really only need 1, the Monchrome.ctb file? Read on to find out how…
If you already understand CTB files, feel free to scroll down to the heading “Do This Instead”.
Let’s look at what we have to work with:
1.AutoCAD users use various colours.
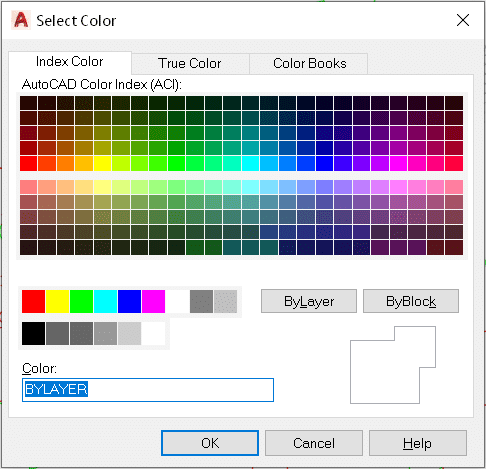
2.Typically, the colours used are chosen from this 256-colour “Index” palette.
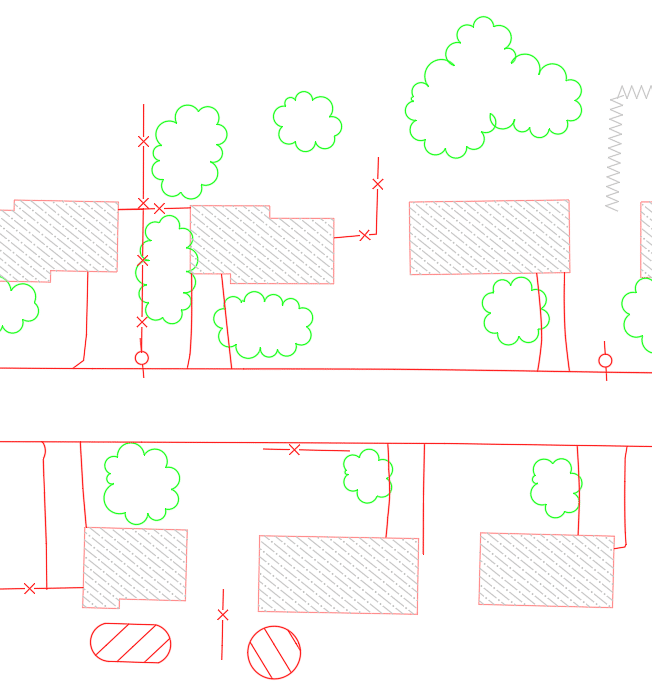
3.Those colours on the screen don’t always print that colour.
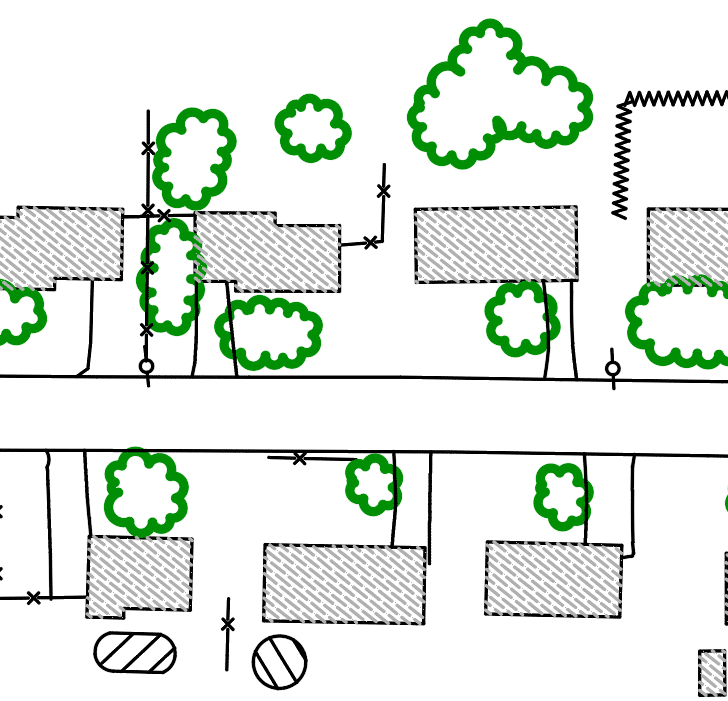
4.Linework need to print to varying widths.
On-Screen:
Printed:
CTB files are the intermediary between the drawing on screen and the final printed product. If one is not used, what you see on screen is what is in the print. They are used to transform what is seen on screen to what is displayed in the print.
Many AutoCAD users rely on several CTB files to print documents to various regulatory standards. Here is why…
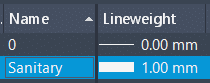
The City of SolidCAD requires a sanitary sewer layer to be red on screen but print black and thick (1mm).
The District of Cansel requires that same sanitary layer to be red on screen but print red and not so thick (0.7mm).
42 other standards exist and a unique CTB file is required for each of them.
Here is the SolidCAD CTB file:
Here is the Cansel CTB file:
THESE ARE NOT REQUIRED!
Yes, that was a little tongue-in-cheek. Sometimes you’re sent a file and you just need to print and use the available CTB. But if you have the time, inclination, and desire to make things a little easier on yourself, understand it’s possible.
Do This Instead
The solution here is actually very simple. Follow these steps.
1.Set the line weight properly for the layer based on the regulatory body standard.
2.Use the out of the box monochrome.ctb file. This file prints all 256 Index colours in black.
How to print hat sanitary layer in red when the CTB file prints all colours black, you ask? Well, I didn’t say the CTB prints all colours black, just the 256 Index colours.
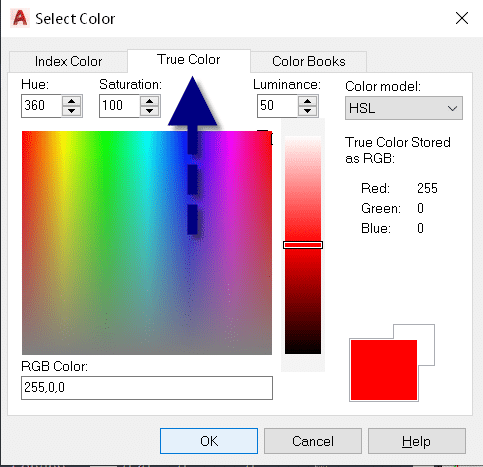
3.When colour is required set the layer colour, not to one of the 256 Index colours, but to one of the 16.7 million True Colours.
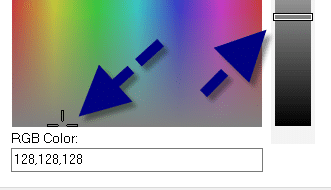
4.You need to print a grey shade? Again, choose a True Colour; just choose a colour at the very bottom. Use the slider on the right to control the shade.
You see, the CTB file does not control the output of True Colours, only the 256 Index colours.
Autodesk has released the latest version of their Civil Engineering package, Civil 3D 2022, and its partner in crime, Infraworks. Click to peruse the Autodesk Documentation. Recap 2022 has also been given some new features. Read on for some notable features.
Civil 3D
Grading Optimization: Takes the parameters that you have specified and generates, very quickly, an optimal grading solution. After installing Civil 3D 2022, you’ll find sample files in the folder C:\Program Files\Autodesk\Grading Optimization 2022\samples.
Connected Alignments: Supports complex curve groups, offsets from parent alignments, curves larger than 180-degrees, and calculates the cross fall of the associated profiles.
Project Explorer: Pressure networks are now supported. Multiple languages are now supported.
Infraworks
Road Decorations: Allows users to add decorations to component roads or linked corridors from Civil 3D. The InfraWorks model will display the features more quickly compared to previous releases.
Decoration Library: Now users can create more realistic landscape environments to add to the model context.
Bridge: Provides for the definition of full-span complex parametric 3D bridge girders.
Model Builder: Enhanced with a new and streamlined interface to provide a more consistent experience and improve usability.
Recap
Scan to Mesh: Select all or a portion of a point cloud in ReCap Pro 2022 and have it create a low, medium, or high-quality mesh. This was included in a previous version as beta software, but it was removed. It is back!
Do you use BIM 360 and AutoCAD products? Do you have the Autodesk Desktop Connector installed? If so, there is a new update. This may not be news to you as there are frequent updates, but this one is somewhat unique. Please read on.
Read the official Autodesk documentation for all the details. Below are the notable changes. Note that some of these changes may affect your Autodesk references and some IT configurations. It is recommended that you discuss these changes with your IT department and/or CAD manager prior to installing.
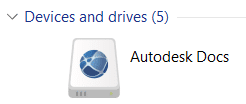
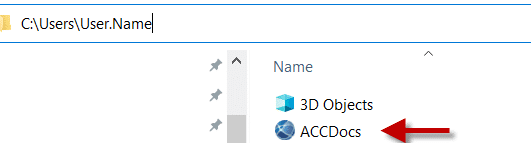
Due to the rebranding of BIM 360 to Autodesk Docs, the local folder will be renamed to Autodesk Docs from BIM 360.
If your files contain supported Desktop Connector file references, their paths will be automatically fixed to the new folder. Should your files contain references that are not supported by the Desktop Connector, those that contain a full path, their paths must be manually fixed by the user.
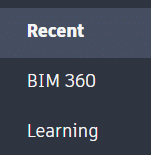
Opening files in the Recent section may not open due to files being moved to the new folder.
BIM 360 local cache files found in %userprofile% are moved to:
AutoCAD 2022 is here and it has a new installer. Very few clicks are required, which is good and easy, but what if you need to customize your installation? Read on…
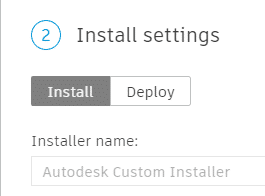
Installers can be customized by logging into Autodesk Account. Installers or deployments can easily be created for multiple products.
1.Log into Autodesk Account.
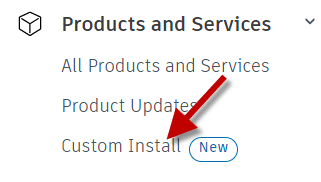
2.Click Custom Install.
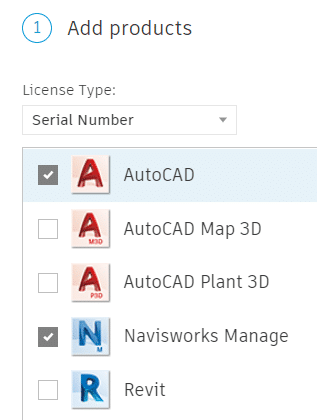
3.Choose your product(s).
4.For all selected products, select your options:
a. choose the version and set the serial number.
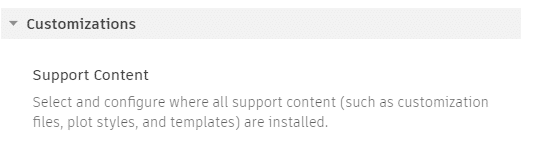
b. Set customization options. These include installation path, custom file paths, security settings, LISP options, Express Tools, custom profile selection, and other settings.
5. Choose which extensions to install.
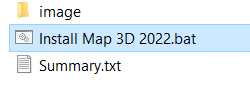
6. Create the installer. This downloads a small EXE file which is used to create the installer. When run, the installation files are downloaded onto the computer to C:\Autodesk. A Windows BAT file is created with all customized options embedded. When run, no input is requested, the app is simply installed.
7. This installer and BAT files can be stored on a server and run by the administrator to install the product, with its customized content, onto users’ computers.
It’s springtime and the birds are singing. Also, Autodesk has released the latest version of their flagship CAD package, AutoCAD 2022. Click to peruse the Autodesk Documentation. Read on to see some notes we at SolidCAD have prepared for you.
**Please stayed tuned for the next article. There will be important information about installing this new software**
The first thing on many users’ minds is whether the file format has changed. It has not! We are still on the 2018 format.
TRACE. A new command enabling a safe collaborative environment to draw revisions without affecting the source drawing. Open a shared drawing in the web or mobile apps and create traces. These traces can be managed by a CAD user in their desktop app.
COUNT. Quantifies selected blocks in a drawing and creates a dynamic table or Field.
SHARE: Shares the current drawing, with all reference files intact, to the web for others to view or edit.
Push to Docs: Creates a PDF of selected layouts and saves to Autodesk Docs.
Floating windows: maximize drawings on separate monitors.
Redefined Start tab.
New installer and options. Very simple install. Watch this blog page for a follow-up article.
Batch publish in background uses multiple cores.
Microsoft’s DirectX 12 is now supported for 2D and 3D visual styles.
3D graphics technical preview. New 3D engine provides a better experience. It is off by default. 3DTECHPREVIEW . Try it and provide feedback.
Is there a Civil 3D object that you would like to double click and run a specific command? if so, read on. (This works for AutoCAD commands too.)
Try double-clicking an Alignment. The AutoCAD properties palette appears. What if we want the Alignment Properties dialog instead? Or if you want the Feature Line Quick Elevation Edit tool to be run when you double click a Feature Line.
Edits to the CUI file are required. Please do yourself a favor and create a partial CUI file and make these edits in there. And while you’re at it, save this file somewhere like My Documents.
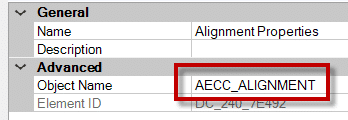
Determine the object name. Run the LIST command and select the object. The object name will be shown. Mine is AECC_ALIGNMENT.
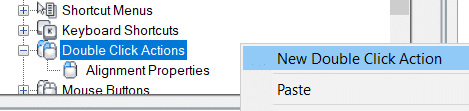
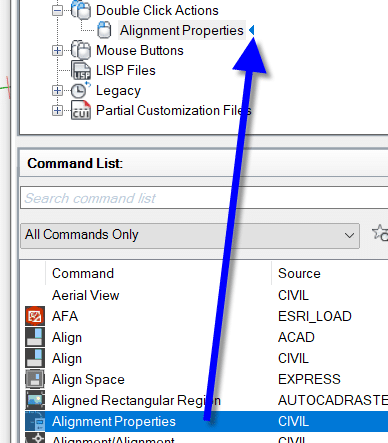
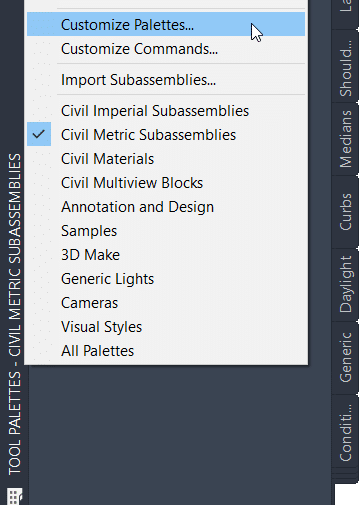
Run the CUI command. The double-click assignments are stored in the CUI file.
Right-click to add a new double-click action. Name it something like Alignment Properties
5. On the right half of the CUI editor, enter the appropriate object name.
6. Find the appropriate command in the bottom-left window. In this case, Alignment Properties. Drag it onto your new double-click action.
7. Close the CUI editor.
8. You’re done! Double click the object and the command will be run.
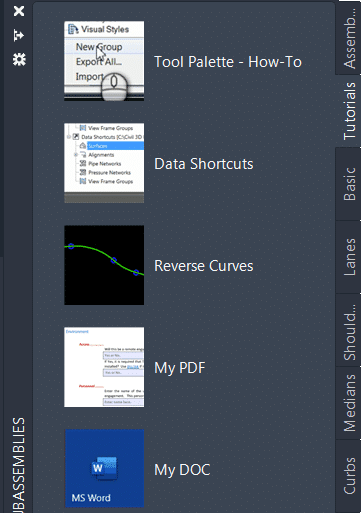
Are you or do you have a staff member in your office who likes to create tutorial content? Or maybe you simply have some web links to which you’d like to regularly refer. Maybe you’d like to share these tutorials with the rest of your AutoCAD team. Sure you can tell them where the videos, documents, or web links are, but the users must open them outside of the AutoCAD environment.
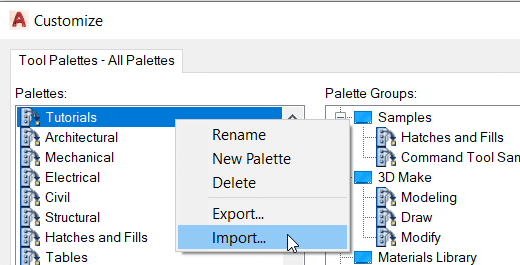
What if the users could access this content right within AutoCAD? The closer the help is to the user, the better, I always say. Consider creating a custom tool palette containing buttons to open these tutorials, and sharing it with the users.
I’ll go on the assumption you already know how to create and share a tool palette. I’ll show you how to create tools that link to files or web links.
Create the Tool
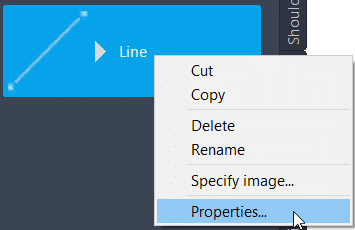
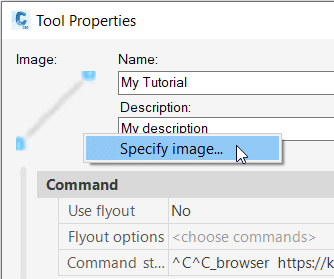
Drag a line or a text object to your new tool palette then edit its properties.
Web Link
Edit 5 properties:
Name.
Description.
Specify Image.
Turn off the flyout option
Edit the Command String. Enter this information ^C^C_browser https://WebLink Paste the link after browser.
File
The only difference between this tool and the web link is the Command string which uses a little LISP code. Enter the path to your file after findfile, within the quotes. DO NOT use back slashes, only forward slashes.