• Civil 3D: Label Styles and Fonts

    Are you “The One” who is master of label style creation for your firm? Have you seen this, and you don’t like it? If so, read on.

    The code in question can occur if, within your Text Component Editor, you have font overrides.

    There is a right click option that is supposed to remove any formatting. But you know what? Sometimes it doesn’t work. What to do?

    The Solution:

    1. Ensure you don’t actually have an alternate font selected in the Format page. It needs to match the font specified in the Text Style for the label style. FYI, if you DO have an alternate font chosen, that {\fCalibri code will not go away with this technique.

    2. Copy the “code” from the editor. Ctrl+A. Copy all of it!

    3. Paste into Notepad.

    4. Copy the same code, but from Notepad this time.

    5. Paste back into the editor.

    6. Done!

    Yes, it does work. Why? I’m not sure. There must be some hidden creatures in there somewhere. Notepad does not allow such things to linger about.

    To learn more about Civil 3D Label Styles and Fonts, or if you have any other questions, please feel free to contact us and one of our representatives will be in touch with you as soon as possible.

    Civil 3D: Targets Without Targets!

    Do you use targets to modify the width of a lane or sidewalk? Would you like to vary a daylight slope over a station range? Are you looking for a different way to handle driveway curb letdowns? If you said yes to any of these, the 23.2 update for Civil 3D has a new feature that can help. Read on.

    You probably know that geometry can be drawn, a polyline or alignment, and then defined as a target to change the width of a lane or sidewalk.

    This works well, but there is a new option now. It’s called Corridor Transitions. Essentially, you can get the same result, but instead of drawing that geometry, the widths can be defined in a tabular format.

    1. Select a corridor and choose Edit Corridor Transitions in the ribbon.
    2. Enter values in the panorama that define the transition you need.
    3. Click Apply.

    Here, the width parameter of the LaneSuperelevationAOR is being controlled by the values in yellow. There are 3 stations ranges that define where and how the transition happens. Also, the DaylightMultiIntercept slope parameter is being controlled by the values in green. It transitions from a 2:1 slope to a 1:1 slope between 4+80 to 5+60, then there are 2 other transition regions after that.


    To define a driveway curb letdown, use the same procedure, except that the subassembly parameter that is varied would be the curb height. 3 transition regions will define a single letdown.

    • From 0.75 to 0.1
    • From 0.1 to 0.1
    • From 0.1 to 0.75

    Enjoy!

    Recap 23.1 Update

    Autodesk’s point cloud management app, Recap, has a new update. Read about it here. Download it from your Desktop App, or at https://manage.autodesk.com/

    All these features are welcome, but two of them are great news to many, especially Civil 3D users. Specifically, the features related to point classification.

    Notable changes are:

    • Scans are now imported and indexed in parallel, meaning faster imports.
    • Clouds can be displayed using their classification if any exist in the imported file.

    • Classifications appear in the Project Explorer. These can be managed as needed. All points except, ground points, for example, can then be exported for use in other apps, like Civil 3D.

    • Unclassified points can be Automatically Classified. Scans must be structured, or the classification will fail.

    Civil 3D: 2023.2 Update

    Autodesk has released the next update for Civil 3D 2023.  Find the release notes here. Install it from the Desktop App or download it from https://manage.autodesk.com

    In this blogger’s opinion, this is one of the most complete mid-cycle updates in recent memory. Here are some highlights:

    Performance

    Always welcome!

    • Up to 60% Improvement
      During various operations including switching between drawings, corridor rebuild, and editing pipe networks.

    Labels

    Labels, especially when many exist in a Civil 3D drawing, can affect performance. All these settings are designed to boost performance.

    • Toggle labels on or off in Paper Space or Model Space
      If you don’t need to see labels right now, turn them off with a new setting.
    • Level of Detail on or off
      As you zoom out, labels will disappear.
    • Redraw options
      Choose when and how labels are redrawn.

    Corridors

    Users have been asking for this one for quite a while.

    • Transitions
      Use a tabular interface to define how subassemblies’ parameters transition between stations. For example, the daylight slope can be 2:1 at 0+000, transitioning to 4:1 at 0+050. Bus bays, or any lane widening can be defined this way. We are no longer limited to using polylines or alignments as width targets.

    Profile Views

    Display additional information about objects and their proximity to a parent alignment.

    • Point Proximity Band
      Show the distance between points and the alignment, and labels distances within the alert distance in red:
    • Alignment Proximity Band
      Show the distance between an alignment and the parent alignment and use ticks to show alignment segments within the alert distance:

    Subassembly Composer

    If you create your own subassemblies, these new features will benefit your productivity and help to reduce errors.

    • Point, Link, and Shape codes
      Define these codes in a dialog and apply them when and where needed.

    • Find and Replace
      Find and replace values almost anywhere in your code.

    • Dynamic Updates
      Change the source definition, and automatically update the instances.

    Pressure Networks

    Since Pipe runs, we continue to get useful features in this area.

    • Connect to Structures
      Pressure pipes can now be connect to pipe network structures and labeled.

    • Appurtenances Don’t Move
      These objects had the nasty habit of moving when the pipe run was edited. This is no longer the case.

    Rail

    These updates bring Civil 3D’s rail tool more in line with U.S. standards..

    • Turnout Blocks
      Turnout symbols can now be inserted perpendicular to the parent alignments.
    • Turnout Abbreviations
      Updated the abbreviation of critical points in the US turnout catalog in line with US regulations.

    Project Explorer

    Improve your reporting.

    • Property Set Objects
      Added support for reviewing property sets in the Project Explorer window.
    • Property Set Review
      Added support for including property sets in object sets, reports, AutoCAD tables, and spreadsheets.
    • Property Set Values
      You can determine the order and visibility of the value, description, and property names. Property set values can be edited.

    Grading Optimization

    Improve your preliminary grading.

    • Pathways
      Objects that represent sidewalks, driveways, and other ingress and egress paths.
    • Ridge Lines
      Objects that represent a linear elevation that directs drainage away from its placement.
    • Isolate Internal Zone Drainage
      You can now isolate drainage objects (drain lines, low points, and ridge lines) within a zone from affecting optimization outside of the zone boundaries.

    Civil 3D: Profile Grade Intersections

    The goal in this example is to design the profile where each grade is an even number.  It’s not as obvious as you might think.  Thanks to my colleagues Dave Hill and Jae Kwon for pointing out the proper tool.

    Read on to learn more…

    Begin by modeling the first 2 segments.  I’ll assume you know the best tools for this, but I’ll give you a hint.  Use the Grid View; it’s your friend here.


    To model the last 5% grade is not entirely obvious.  Yes, a 5% tangent can be drawn from the end of the 1% grade, but it doesn’t end in the right place.

    We sort of want to draw backwards from the end of the red profile then extend the 1% grade.

    Use this tool and follow the prompts.  First select the 1% grade, then pick Station and Elevation and the tie-in point.  Then enter the grade, in this case -5% (the grade from the intersected PVI).


    C’est voilà!

    Civil 3D: Scary Halloween Tidbit

    Many AutoCAD users know about the OVERKILL command, which is used to delete duplicate objects. There are settings which define what exactly constitutes a duplicate object. Same geometry, layer, colour, etc.

    Many Civil 3D users configure pipe networks in their templates, so users need not create them on the fly when it’s time.

    Here is the scary bit. Please, DO NOT use the overkill command when there are empty pipe networks in a drawing. If you do, your pipe networks will be…

    Seriously, they will be deleted unceremoniously. Don’t do this!

    Civil 3D 2023.1 Update

    Autodesk has released the Civil 3D 2023.1 update.  Use the Desktop App to install it or download it from your Autodesk AccountClick here to find out what’s new and what’s been fixed. Please note that you must first install the AutoCAD 2023.1 update.

    Most of the enhancements are centered around Autodesk Docs features.


    Fixed Issues

    Autodesk Trust Center

    For the latest information regarding the security fixes in this Update, refer to the Security Advisory:

    ADSK-SA-2022-0014

    ADSK-SA-2022-0016

    Problems Reported Through the Customer Error Reporting Utility

    As a result of the detailed information that we received from customers who used the Customer Error Reporting Utility, we were able to identify and fix several defects including the following:

    Graphics

    Occasional crashes when selecting some objects with BLEND commands under “Shaded (Fast)” visual style.

    Occasional crashes when switching to “Shaded (Fast)” visual style in some drawings.

    Occasional crashes when launching AutoCAD on some machines with few specific graphic drivers.

    General

    Occasional crashes when opening and then saving some specific drawings.

    Occasional crashes when using PASTESPEC to copy Microsof Excel table into the drawing.

    General Update Content

    The following defects have been fixed:

    Display

    When you turn on/off layers, the objects in the drawing are reflected correctly.

    The dimension preview now displays under “Shaded (Fast)” visual style.

    The 3D objects can rotate correctly on the expected location when orbiting through 3D gizmo under “Shaded (Fast)” visual style.

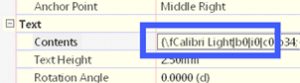
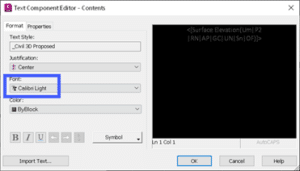
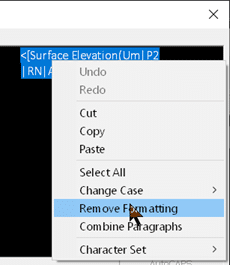
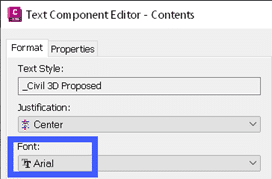
    Bold and italic formatting in MTEXT now works as expected under “Shaded (Fast)” visual style.

    Markup Import and Markup Assist

    The Markup Assist boundary displays correctly when holding the wheel to pan on one of the locked viewports.

    The Markup geometry keeps the uneditable status after using the TRACEBACK command.

    Pressing the Esc key now cancels the Markup Import process.

    The imported images keep the embedding status after the Markup import is completed.

    Performance

    Improved performance when plotting a file with the raster image pasted and setting “Background Transparency” to Yes.

    Improved performance when orbiting the drawing containing multiple leaders with SHIFT+middle mouse button under “Shaded (Fast)” visual style.

    Improved performance on Hatch pattern previews on the ribbon drop-down list.

    Trace

    The Markup entity can be recognized successfully after undoing the new trace creation.

    The “Trace – Name Already Exists” message now displays when there is a duplicate trace name.

    Sheet Set Manager with Autodesk Docs

    The Edit button on the Sheet Set Manager for Web palette automatically adapts the palette width.

    The expand status on Sheet Set Manager for Web palette is now kept when switching the color theme in AutoCAD.

    The cloud DST file is now recorded on the Recent documents list.

    User Interface

    Drop-down lists now display clearly in certain dialog boxes in Windows 11.

    The QVLAYOUT thumbnail previews can be hidden automatically when selecting one of the layout previews.

    The underscore in the action macro name on the Action Recorder panel now shows in the drop-down list.

    The Close button now displays completely on the top-right side of the Start tab.

    The scroll bar and icons now show correctly in the Recent tab when setting display scale to certain values.

    An error message has been fixed when pressing the Esc key to close “Sort” pop-up list on the Start tab.

    Any layer can now be dragged into a Layer group filter in Windows 11.

    General

    TRIM and HATCH now recognize the edges of Civil 3D objects.

    All copied dimensions now appear at their specified locations correctly when associative dimension is copied multiple times.

    OLE objects now display correctly in Windows 11.

    Commands can now be entered immediately after switching layouts between multiple layouts.

    The renaming function in the Sheet View Category on the Sheet Set Manager is now implemented successfully.

    The Explode option on the Blocks palette is now retained after relaunching AutoCAD.

    The OVERKILL command behavior is now consistent with legacy products.

    Some specific STEP files are now imported correctly into AutoCAD.

    MLEADER objects converted from multiple text objects can now be set to a correct Z value.


    Parent page: AutoCAD Updates

    AutoCAD 2023.1 Update

    Autodesk has released the 2023.1 updates.  Use the Desktop App to install it or download it from your Autodesk AccountClick here to find out what’s new.  Additionally, the 2023.0.1 update is also available.

    This release includes new and updated features, performance enhancements, and fixes for Autodesk® Civil 3D® 2023. It is strongly recommended that you read this entire document before installing.

    Note: AutoCAD 2023 Update 1 must be installed before Civil 3D 2023 Update 1. AutoCAD 2023 Update 1 cannot be uninstalled independently. To remove the update, you must reinstall Civil 2023.0.

    New Features

    Find out about the new and improved features in the Autodesk Civil 3D 2023.1 release.

    Fixed Issues

    Find out what issues have been fixed in Autodesk Civil 3D 2023.1.

    Known Issues

    Find out about known issues in Autodesk Civil 3D 2023.1.

    Installation

    Detailed installation information can be found in the Autodesk Civil 3D installation help topics.

    • It is recommended that you first install all Microsoft® Windows® updates prior to installing Autodesk Civil 3D 2023.1.
    • Please close all applications prior to installing Autodesk Civil 3D 2023.1.
    • Autodesk Civil 3D 2023.1 can be installed side-by-side with prior versions of Autodesk Civil 3D.
    • If your team works in a multi-seat stand-alone environment, you can repeat this basic installation process for each computer seat. Alternatively, an administrator can create a deployment.

    Civil 3D: Plan Production Styles

    Do you use Civil 3D’s plan production tools?  Do you wonder where the styles come from, the design file, the production template?  Read on to find out.

    If you’re not familiar with Civil 3D’s plan production tools, here are the Cole’s notes.

    • Paper space layouts complete with your company’s title block and plan and/or profile viewports are created automatically along the entire length of a selected alignment.
    • A plan production template must be selected which contains a layout configured for use with this feature.
    • These layouts can be created in one of three places:
      • In the current drawing.
      • In new drawings, one layout per drawing.
      • All layouts in a single new drawing.

    When the option to create layouts in a single new drawing or multiple drawings is chosen, there are three files in play.

    • The design file
    • The selected plan production template
    • The production sheet file the tool creates

    Both the design file and the selected template can contain styles.  They could be the same styles, or they may be different.  When creating the new drawings, which of these two files does Civil 3D use as the template: the starting point?  Where do the styles and settings come from?

    The answer is both, sort of.  Here is what happens:

    1. Civil 3D uses the design file as the template.  All styles and settings come from this file.
    2. Any styles present in the production template are then duplicated into the new production sheet drawing.
    3. If there are any styles in the production template that are the same name as the design file, they are ignored.  The design file styles are maintained.

    Note that Style 3 is present in the Design and Template files.  In the Sheet file, Style 3 is the same as the Design file.