• Why you should replace your AutoCAD/Civil 3D Tool Palettes with Hive CMS libraries

    As an organization grows, it will navigate through projects of different size and nature. Rules and structures need to be fixed, and when managing engineering data comes into play, engineering and production standards need to be applied.  

    Within AutoCAD and Civil 3D, an engineering firm, a contractor or a government agency will gather standards through templates, support files, specific symbology for lines, blocks and infrastructure representations (Civil 3D styles and Labels).  

    The closest thing out-of-the-box to a user-friendly interface to structure these standards is a Tool Palette: 

    AutoCAD Civil 3D

    Pros of using a Tool Palette: 

    • Drag-and-dropping objects in the tool palette is an easy way to bring in some content (mainly AutoCAD but limited to assemblies for Civil 3D).  
    • Buttons can launch complex commands, scripts and lisp routines. 

    Cons of using a Tool Palette: 

    • Limited in terms of Civil 3D objects integration. 
    • Launching “non-AutoCAD” files from the command demands complex command buttons, with proper mapped drive on a server (i.e.: Word/PDF documents containing design standards shared to the whole Team) and are near impossible to launch from a cloud data connector (i.e.: OneDrive, Google Drive, and even Autodesk Construction Cloud). 
    • No search engine is available to sift through growing amounts of standards, commands and files that could scale up with your growing organization as time goes on. 
    • Deployment across an organization is extremely complex, due to Tool Palette “obscure” ties in a user profiles and file structure. Same goes for updating your standards over time. 

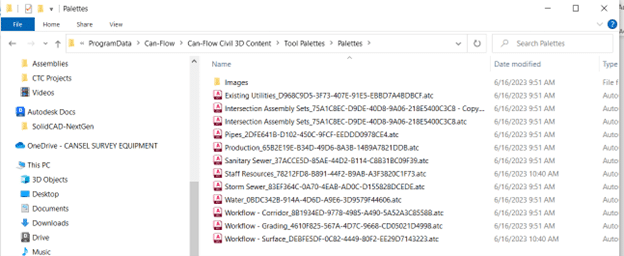
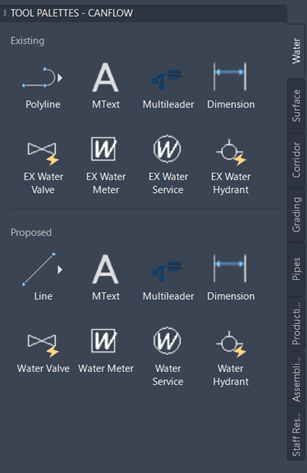
    For example, here’s the first level of Tool Palettes file’s structure: 

    AutoCAD Civil 3D

    And here’s the second level of Tool Palettes file’s structure: 

    AutoCAD Civil 3D

    Hive CMS is a desktop application that will solve these issues, leveraging a cloud system to easily share your CAD standards and design files (AutoCAD, Civil 3D and non-drawing-based files).  

    Developed by CTC Software, Hive supports organizations to share content via a cloud platform, completely compatible with supported versions of AutoCAD and Civil 3D. Among the different types of shareable content, you will find: 

    • AutoCAD Blocks, 
    • AutoCAD/Civil 3D Commands (handling all other kind of object creation and more), 
    • Civil 3D object styles and labels, 
    • Civil 3D assemblies, 
    • Templates, 
    • Lisp routines and script files, 
    • Non-drawing-based files (basically every other types of files like Office files, PDF, PKT, and so forth). 

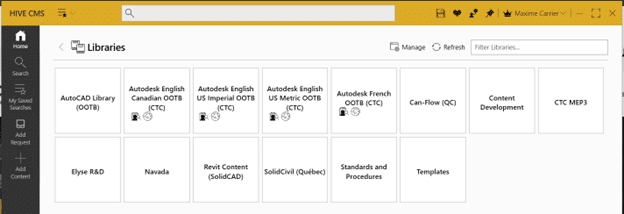
    Hive stores these elements in libraries, as shown in the Hive CMS main interface: 

    AutoCAD Civil 3D

    And then browsing through the different libraries your organization WANTS you to see and work with. 

    AutoCAD Civil 3D

    As you are connecting in your CTC account, Hive CMS filters what shareable content your CTC Account administrator has given you access to.  Depending on the “contribution” level you have access to, you can add, manage and assign “tags” that are basically extra metadata that will help your team search and filter through your shared content. 

    Here’s some tags as an example: 

    AutoCAD Civil 3D

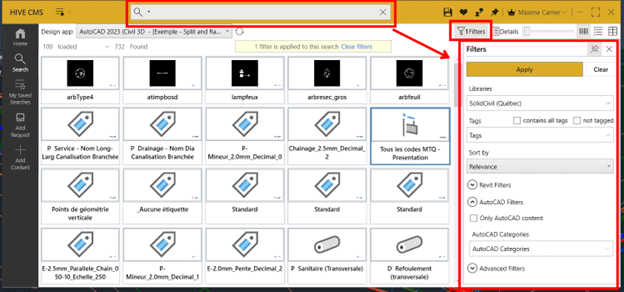
    The search engine from Hive CMS is extremely powerful, helping you sift through your organization ever-changing and ever-growing standards. The Filter menu allows you to do some advanced search using content name and metadata, and even save it for further uses (for you or for your entire organization). 

    AutoCAD Civil 3DT

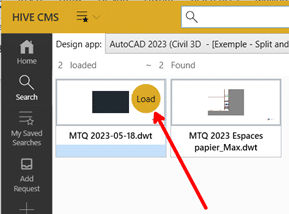
    o use a piece of content, just click it from the Hive CMS interface and it will launch in your currently opened drawing or will add itself to your current drawing (for Civil 3D styles and labels), ready to be used. 

    To launch a file, like a new drawing from a template or opening a PDF document in your default application, just click it from your library: 

    AutoCAD Civil 3D

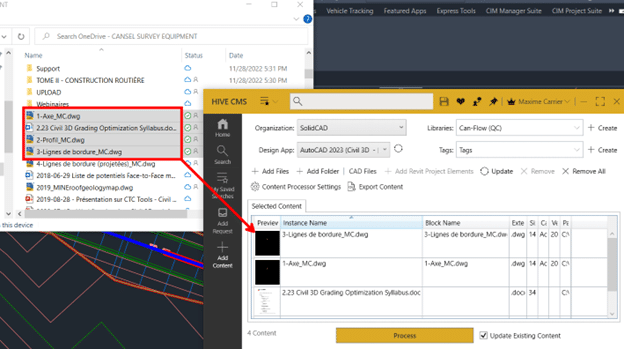
    While there are some subtilities to upload content to your libraries (not covered in this blog), uploading files in Hive CMS is done as easily as drag-and-dropping your files from Windows File Explorer to the “Add content” tabular editor, assigning a Library (and appropriate Tags) and clicking the Process button. 

    AutoCAD Civil 3D

    In conclusion, the Hive system will help your organization to better support your CAD and Civil teams with scalable tools that are easily shared and covering any needs you want from a custom user interface, a custom Tool Palette and so much more. Hive makes your standard deployment easier, safer and way more user-friendly for everyone involved (administrators, superusers and users alike). 

    CTC MEP3 2020.1.2 Update

    What is the CTC MEP3?

    The Mechanical Electrical Plumbing Productivity Pack leads the market as the ultimate content package today, precisely tailored for businesses engaged in the fields of both mechanical and electrical design engineering. The MEPPP seamlessly consolidates the Mechanical and Electrical Productivity Packs into one easy to use pack, ready for immediate deployment straight out of the box.

    CTC MEP3 Overview:

    • Project setup time is decreased by utilizing comprehensive project organization.
    • 50 view templates for all view types, including schedules and 100 predefined view filters.
    • 350+ mechanical families based on manufactured content.
    • Over 225 mechanical details with all Revit linework and annotations
    • More than 350 electrical families with over 200 symbols
    • All family content is fully integrated with extensive schedules & tags.
    • User manual includes links to instructional videos.

    CTC MEP3

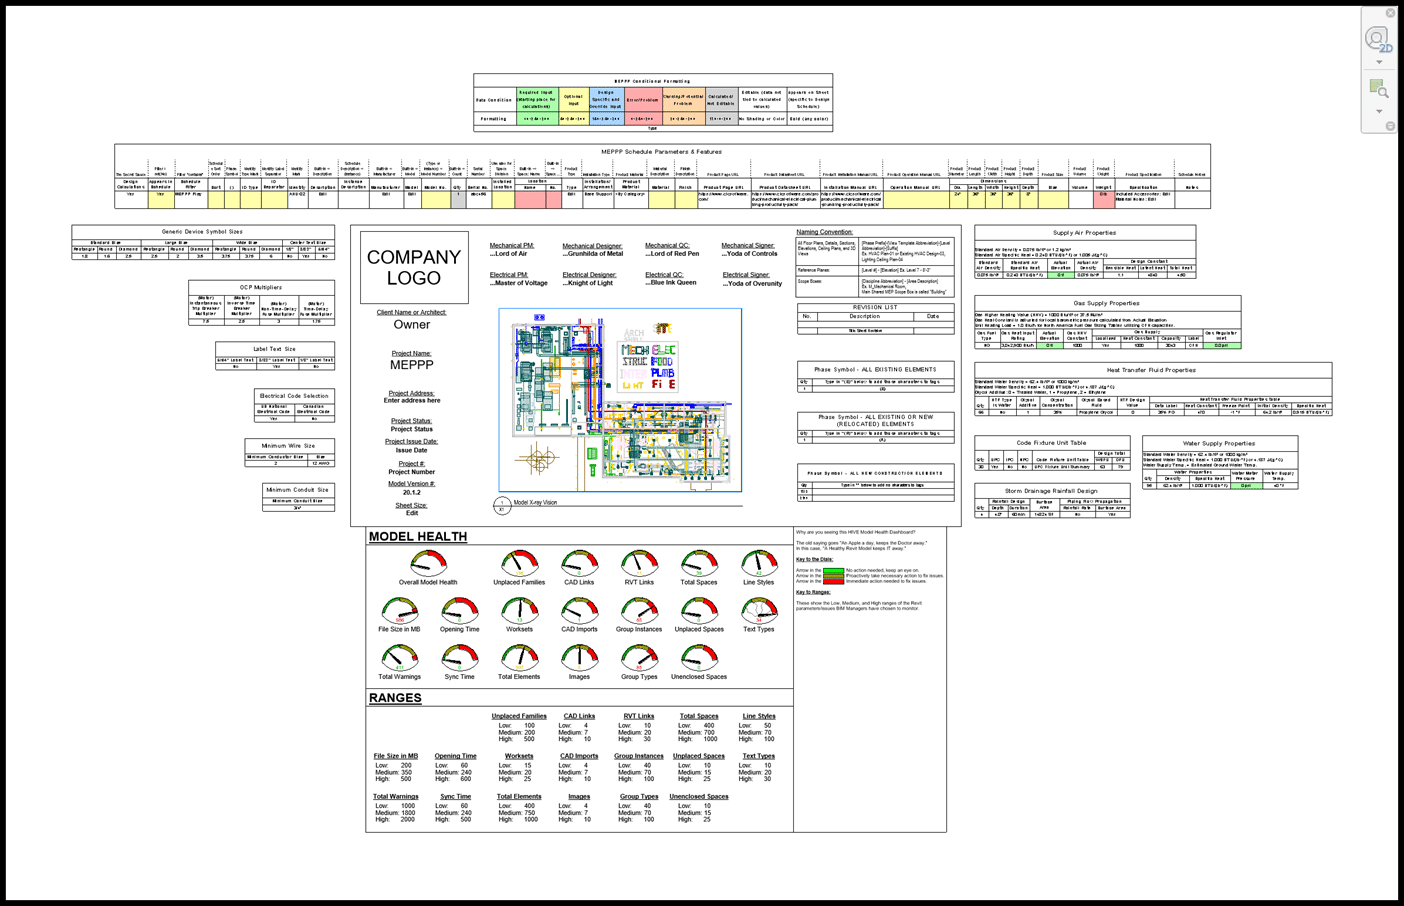
    Figure 1 Cover View

    Previous MEP3 Updates:

    20.1.0

    • Electrical Family Improvements
    • Electrical Hosting
    • Electrical Workflows
    • NEMA Endorsement
    • Conditional Formatting

    20.1.1

    • Mechanical Content Improvement
    • Workflow Consistencies
    • Further Parameter Standardization

    What’s New in 20.1.2?

    Performance Improvements

    • Due to changes in Revit 2021+, combined parameters have been removed to produce “10x” speed improvements.
      • 116 schedules updated.
    • Improved formulas for performance
    • Family structure optimized.

    New Schedules

    • 118 new schedules added across the MEPPP.
    • Full conditional formatting

    Updated Conditional Formatting

    • 10 design schedules updated to new conditional formatting.
    • 101 schedules updated for consistent overall formatting.
      • Organization of parameters, justification, title headers etc.

    New Parameter Groupings

    • 37 parameter types have been re-grouped across all relevant families.
    • 20 family collections have updated <type> vs <instance> parameters.
    • 35 family collections have signification calculation updates.
      • Calculations previously were not inaccurate but were optimized for performance and modernized for current calculations.

    Updated Visibility Graphics

    • 7 view collections have significant updates to visibility graphics. 

    Air Terminal Enhancements

    • Significant updates to auto-sizing
    • New non-auto-sizing options
    • Greater number of families
    • Significant performance improvement

    Families and Types

    • New tagging options (4)
    • New types
      • Condensate Pump
      • PTAC (Wall Unit)
    • New Families
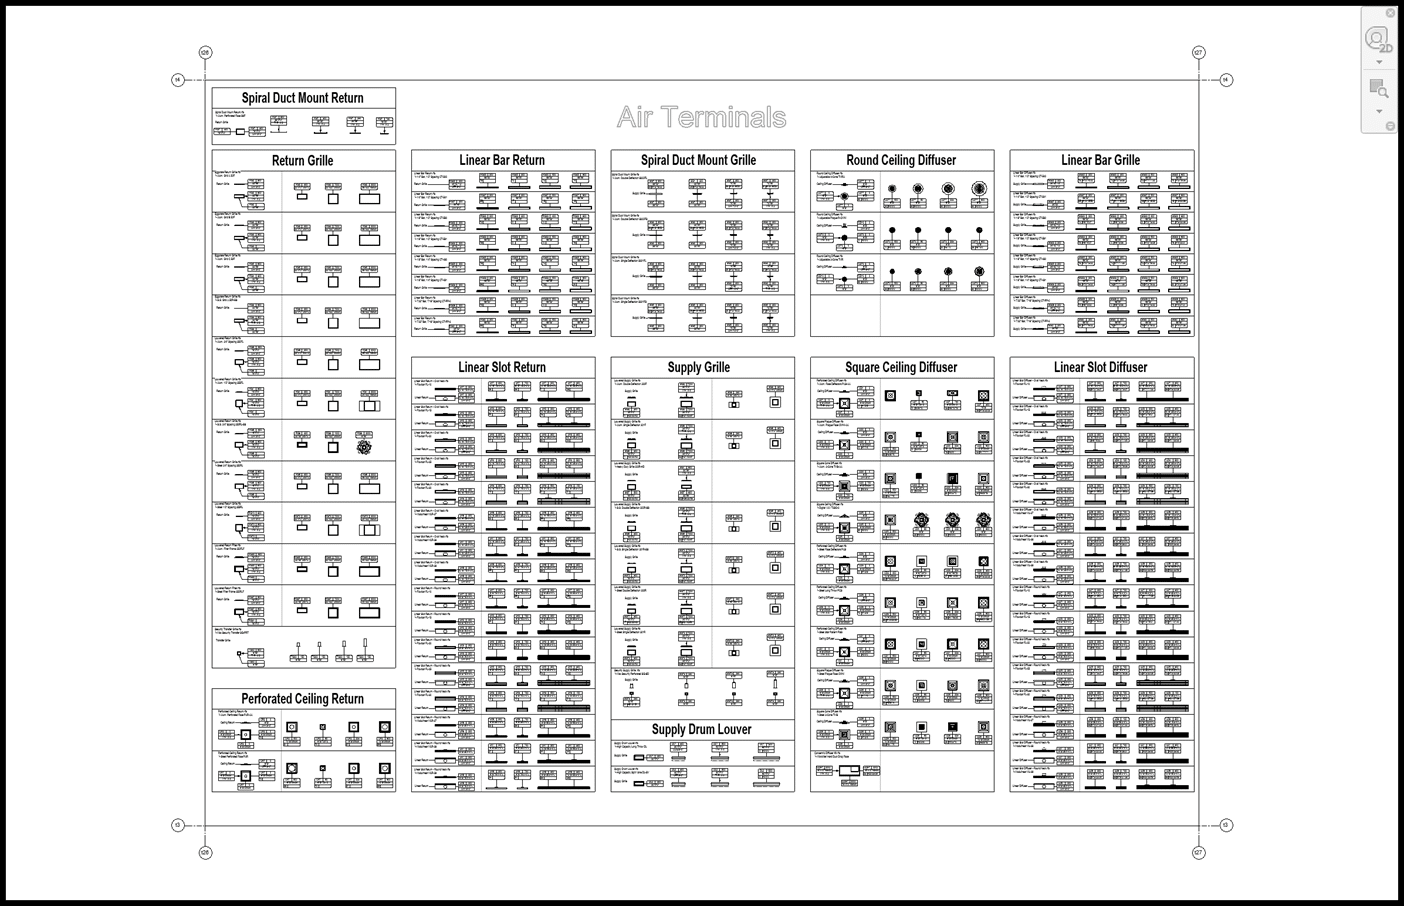
      • Air Terminals (25)
      • Outdoor Split System – Residential
      • Domestic Booster Pump
      • Standpipe Valve

    CTC MEP3

    Figure 2 Air Terminals

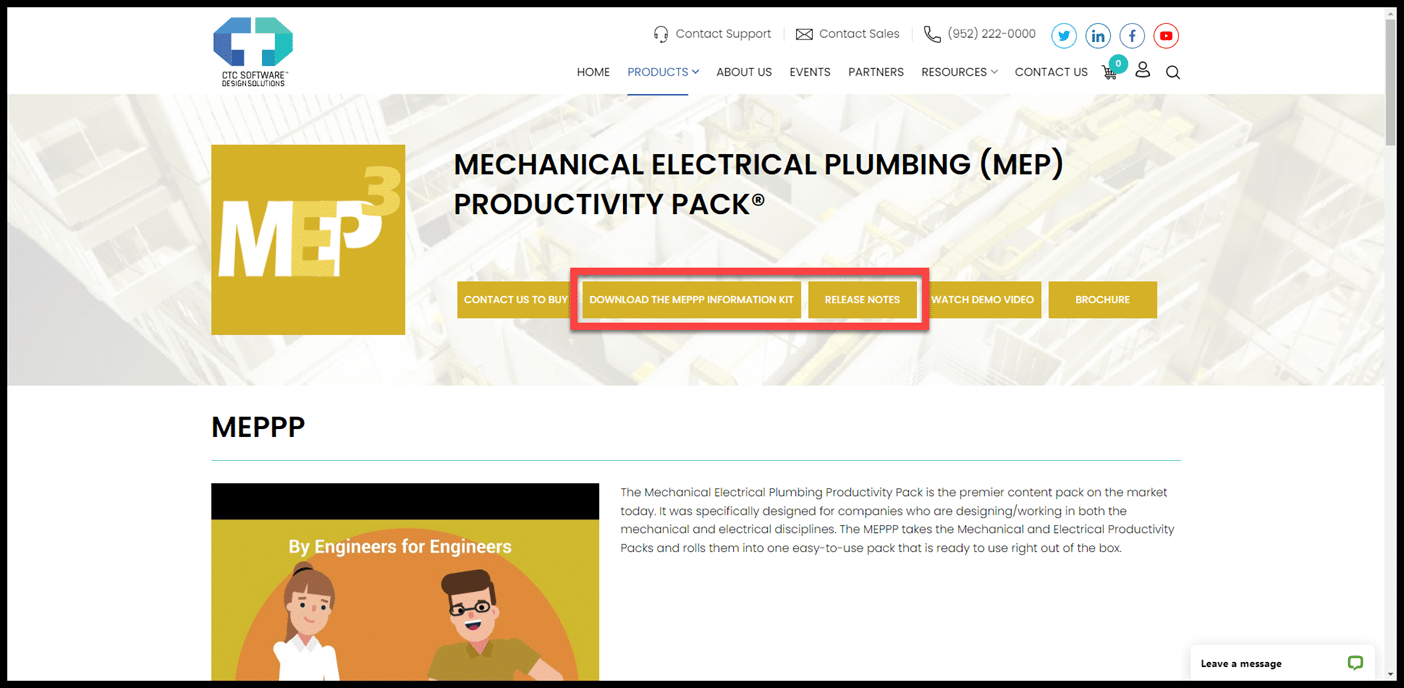
    For a full list of all the new features, enhancements, and fixes, visit www.ctcsoftware.com and review the Mechanical Electrical Pluming (MEP) Productivity Pack release notes or download the MEPPP Information Kit.

    CTC MEP3

    Figure 3 www.ctcsoftware.com

    For any questions reach out to your sales rep or contact us at info@solidcad.ca.

    Is a Fossil-Free Jobsite Possible?

    This story was originally published by on the Bluebeam Blog.

    A zero-emission jobsite, with no fossil fuel consumption, means the construction industry has to create a zero-emission construction fleet. It is not as big a stretch as it initially sounds

    For Thanksgiving this past year, my mother hosted our family, which meant we would be traveling to my hometown in the middle of Texas. The rental company presented me with an electric vehicle option in Austin, and I decided this would be great. But after driving a bit (OK, more than a bit) over the limit and in cold weather, that 280-mile range was almost exhausted at 142 miles. And there is no EV infrastructure in my hometown. Not one public charger. So I plugged it in, and 36 hours later had enough juice to make the trek back to Austin. Naturally, I started thinking about this in the context of the construction industry, and it led me to wonder what better eco-friendly methods there are to manage all-day usage. I was especially curious about hydrogen.

    Imagine a fossil-free jobsite—one where we are not consuming petrochemical-based fossil fuels and with zero on-site emissions. Disregarding vehicular energy requirements, which may still require fossil fuels for generation depending upon the location, for this conversation lets focus on emissions at the site.

    Is “zero emission” a realistically attainable goal? In fact, it is not only possible, but available today—for those willing to make the investment and test new processes on their next construction site.

    A zero-emission jobsite, with no fossil fuel consumption, means we have to create a zero-emission construction fleet. It is not as big a stretch as it first sounds. There are already options for those willing to make the leap—electric battery or hydrogen-powered equipment.

    Battery-powered machinery is a great option, with potential range capabilities per charge or fueling equal to or greater than gasoline or diesel. The downside: these technologies require 2-8 hours to recharge assuming a high-voltage source, which leads to inefficiencies and project downtime. Hydrogen, on the other hand, has the same range as battery-powered machinery without the downtime associated with refueling.

    The long-term savings achievable with these technologies can easily offset the upfront costs of switching from gasoline or diesel machinery, while contributing to the fossil fuel- free worksite.

    It is also possible to convert existing gasoline or diesel equipment models to hydrogen with minimal machine redesign. This can be achieved by converting to a hydrogen combustion engine, which operates similarly to traditional internal combustion engines (ICE), with cylinders pumping compressed hydrogen gas rather than gas or diesel. Just like an ICE, a spark ignites the hydrogen gas, creating power to drive the machinery. This can often be a more affordable and simpler option to reduce fossil fuel consumption on the jobsite.

    However, a challenge with burning hydrogen in internal combustion engines is the possibility of pollutant emissions such as NOx and particulate matter (PM) being produced. These are harmful to human health—in fact, GeoHealth finds that eliminating pollutant emissions from energy-related activities, including construction, could prevent more than 50,000 deaths a year in the US. Because of this there is increasingly stringent legislation against them. One way of reducing the levels of NOx produced involves increasing the amount of air in the combustion chamber, but this reduces efficiencies. Another way is to favor an engine that takes the “flame” out of the combustion reaction altogether. As the harmful pollutants in question are formed around a flame, this approach is extremely effective at eliminating them.

    Hydrogen fuel cells use a catalyst to generate electricity through a chemical reaction. With this method, hydrogen is held in a fuel cell on the machinery itself and is powered through a negative electrode terminal—hydrogen is funneled between an electrolyte and another positive electrode terminal. This creates a chemical reaction that results in a continuous flow of electricity to the batteries. Naturally, this seems like the best option because of the continuous creation of energy, but it is more complicated and expensive to implement.

    Other solutions use a flameless combustion reaction to generate electricity from fuels. This technology can be fuel-agnostic, using flameless combustion technology, which uses high temperature exhaust heat recovery to unlock pollutant-free power from any fuel at the flick of a switch. With hydrogen being just one option for fossil-free fuel, this approach enables contractors to leverage whichever renewable fuel is most cost-effective and abundant at any one time.

    It’s important to protect profit margins from dramatic fluctuations by enabling balance between sustainability and cost throughout the energy transition on a project-by-project, day-by-day basis. This means sites can deploy fuel-agnostic generators at scale today and see immediate carbon and pollution reduction benefits—much to the benefit of site teams, the environment and the local community, offering an alternative and lower-risk entry point for transitioning to fossil fuel-free jobsite.

    So what are other downsides of using hydrogen as an energy source? The biggest is safety. Hydrogen has a small molecular size, so if it leaks through solids and mixes with air, it can be explosive, similar to gasoline or diesel. It is also not naturally occurring, so it has to be extracted from fossil fuels, compressed and then used to create a chemical reaction, converting energy into electricity to power electric motors on the construction machinery.

    L’histoire de la réussite de NextGen Mold

    null

    NextGen Mold

    SUCCESS STORY
    Informations sur l'entreprise

    NextGen Mold Technologies a été fondée en 2021, à la suite de l’acquisition de l’entreprise l’entreprise Mold. Basée à Windsor, en Ontario, elle s’est rapidement forgée une solide réputation dans l’industrie des moules à injection. Le large éventail d’équipements et la structure des équipes 24/7 permettent à NextGen d’offrir à ses partenaires des délais d’exécution rapides et efficaces pour la faisabilité, la conception, l’entretien des moules, les changements d’ingénierie, les réparations et les nouveaux outillages.

    L’idée de NextGen est d’utiliser les outils les plus pratiques à leur disposition, en équilibrant les coûts et l’efficacité tout en donnant la priorité à leur capacité à répondre aux normes des clients. Cela leur a permis de connaître un grand succès et une croissance rapide. Ils ont acheté trois nouvelles machines au cours de la  année dernière et s’efforcent de poursuivre sur cette lancée.

    Fusion 360 Probing et PowerMill : un succès immédiat

    null

    Défi :

    Être un nouvel acteur dans l’industrie peut présenter de nombreux défis. Le plus gros obstacle pour NextGen Mold concernait les coûts de recrutement et de formation. Il était extrêmement important de pouvoir être opérationnel, ce qui signifiait s’assurer qu’ils avaient les bonnes personnes dans leur équipe. Ils savaient que pour réussir, ils devaient donner à leur équipe les outils et les ressources.

    Le défi était d’autant plus grand car NextGen était en démarrage au plus fort de la pandémie. Outre les difficultés de recrutement habituelles liées à une pénurie de main-d’œuvre qualifiée, les considérations de trésorerie ont également constitué un facteur essentiel à ce moment-là. NextGen avait besoin d’un partenariat qui comprenne ces défis et offre la flexibilité nécessaire pour soutenir un résultat favorable en période d’incertitude. Ils avaient également besoin d’un logiciel de conception puissant, avec un temps de configuration réduit, qui puisse s’intégrer facilement à leur logiciel d’usinage pour garantir l’efficacité et éviter tout retard inutile.

    Solution :

    Connaissant la situation critique qu’occupait NextGen, SolidCAD a été en mesure de proposer une facturation flexible et un support client dédié. Les équipes commerciales et techniques possèdent une expérience incroyable du secteur et une compréhension des défis et des besoins auxquels une nouvelle entreprise peut être confrontée. Ils ont travaillé pour trouver des solutions rapides et flexibles pour soutenir NextGen au début de leur voyage.

    Après avoir évalué les besoins de NextGen et recu  des conseils, ils ont décidé d’opter pour PowerMill et Fusion 360 Probing. La formation de l’équipe a été essentielle pour un bon départ. Fusion 360 est un logiciel puissant doté d’une interface simple qui facilite l’utilisation, en particulier pour la formation. En outre, l’intégration avec PowerMill a permis d’éviter la duplication inutile du travail ou la perte de données. NextGen a qualifié de positive son expérience avec SolidCAD, en particulier le délai d’exécution des devis, ainsi que la connaissance approfondie des produits, qui sont des caractéristiques qui distinguent SolidCAD.

    Résultats :

    • La formation technique a permis à NextGen d’offrir à son équipe les outils, les connaissances et les ressources dont elle avait besoin pour réussir.
    • NextGen a utilisé Fusion 360 sur leur machine Parpas pour inspecter des pièces dédiées au CMM afin de vérifier qu’elles sont usinées selon les données, garantissant ainsi des résultats cohérents et de haute qualité.

    Les fonctions de palpage de Fusion 360 ont permis de réduire les taux de reprise et d’économiser des temps de mise en route inutiles

    Produits et services utilisés

    null

    Témoignage

    ” SolidCAD répond et dépasse les attentes en proposant des solutions de CAO/FAO éprouvées. ”

    Alain Balyan,

    Responsable de l’usinage chez NextGen Mold

    NextGen Mold

    Success Stories

    NextGen Mold

    Nectgen mold

    NextGen Mold Technologies was founded in 2021, following the acquisition of Enterprise Mold. Based in Windsor, Ontario, they have quickly established a strong reputation in the injection mold industry. The wide array of equipment and 24/7 shift structure allows NextGen to offer their partners quick and effective turnaround on feasibility, design, mold maintenance, engineering changes, repairs, and new tooling. 

    The idea at NextGen is to use the most practical tools available to them, balancing cost and efficiency while prioritizing their ability to meet customer standards. This had led them to great success and rapid growth. They’ve purchased 3 new machines in the last year alone and strive to keep that momentum going forward. 

    Implementing PowerMill with Hands-On Local Support for Reduced Cost and Production Time

    Challenge:

    Being a new player in the industry can present many challenges; one of the more challenging hurdles for NextGen Mold quickly became recruitment. It was integral for them to hit the ground running, which required hiring the right people out of the gate to have the resources they needed to succeed.

    This was especially challenging as NextGen was a new startup in the peak of the pandemic. Along with overcoming the usual recruitment difficulties incumbent with a skilled labour shortage, cash flow considerations were also a critical factor at this time. NextGen needed a partnership that understood these challenges and offered the flexibility required to support a favourable outcome during uncertain times. They also needed a powerful design software with low setup time, that could easily integrate with their machining software to ensure efficiency and avoid any unnecessary delays.

    Solution:

    Understanding the importance of meeting our client’s needs, SolidCAD was able to offer flexible payment terms and dedicated customer support to promote a smooth setup experience and offer ongoing technical support. The sales and technical teams have unparalleled industry experience, understanding the challenges and needs a new business may face. They worked collaboratively to offer pertinent, timely, and customized solutions to support NextGen at the start of their journey.

    After assessing NextGen’s needs and providing guidance, they decided to go with PowerMill and Fusion 360 Probing. Training their team was integral to a strong start. Fusion 360 provided powerful software with a simple interface for ease of use, especially when it comes to training. Additionally, the integration with PowerMill avoided unnecessary duplication of work or lost data. NextGen highlighted their experience with SolidCAD’s customer service as a positive experience, specifically the turnaround time for quotes and seats, and extensive product knowledge as characteristics which set SolidCAD apart.

    Results:
    • Technical training allowed NextGen to give their team the tools, knowledge and resources they needed to succeed.
    • NextGen have been using Fusion 360 on the Parpas finishing machine to inspect/CMM jobs to verify they are cut to data, ensuring consistent and high-quality results.
    • Fusion 360 Probing has helped reduce rework rates and save unnecessary set-up time.

    Testimonial

    SolidCAD meets and exceeds expectations offering tried and tested CAD solutions.

    - Alain Balyan, Machining Manager at NextGen Mold

    Products & Services Used

    Similar Projects

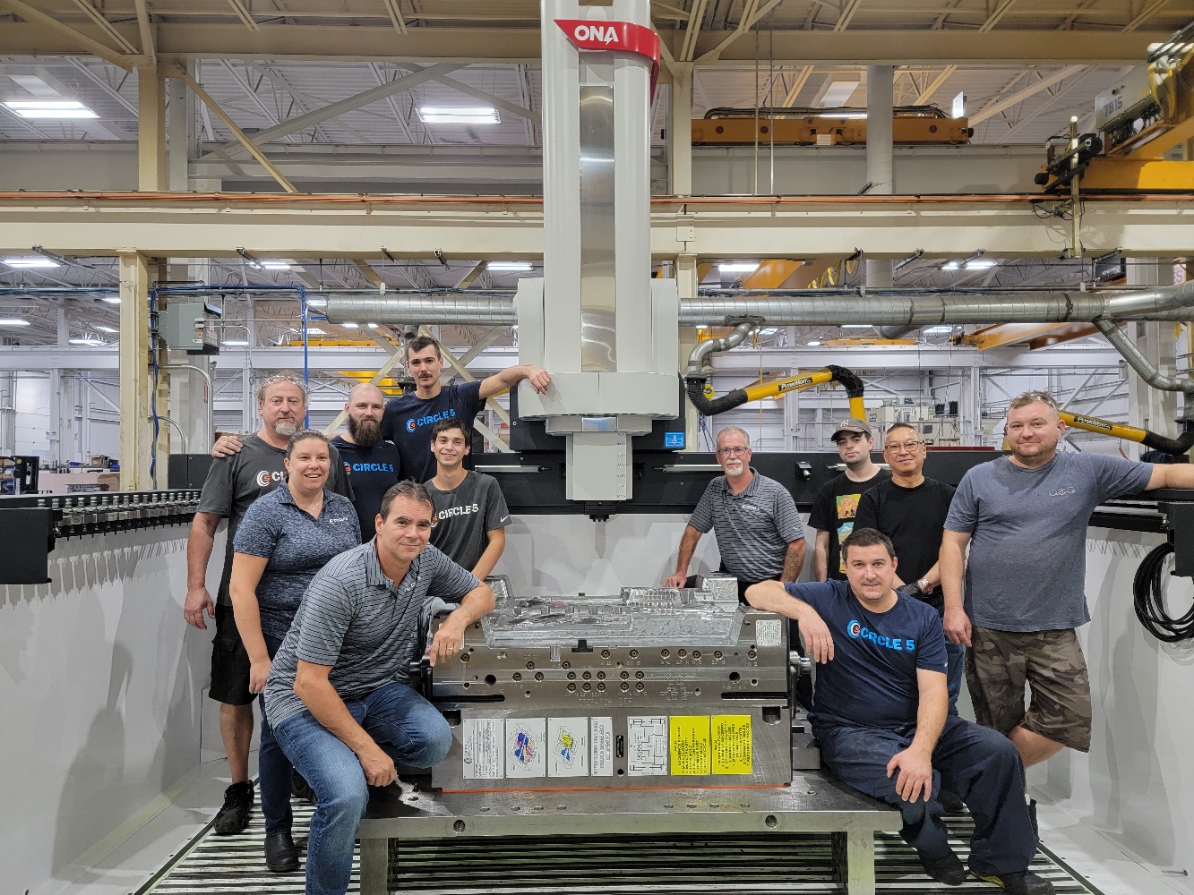
    Circle 5

    Founded in 1987, Circle 5 has established itself as a leader in the manufacturing and prototyping industry. Their expertise in machining both ferrous and non-ferrous metals, combined with their state-of-the-art multi-axis CNC and EDM capabilities,…
    Manufacture Scorpion Success Story

    Manufacture Scorpion

    Manufacture Scorpion is a manufacturer/distributor whose mission is to make the world’s best pneumatics and vacuum technologies available quickly and easily to North American companies. As the largest Pneumax partner, they have exclusive agreements with…

    RGTECH

    RGTECH is a specialty precision machining company. Founded in Lévis, QC by experienced industry professional, Rémy Gagnon, RGTECH works closely with several industries including the medical, optic/photonic and electronic industries to provide high quality parts…

    Dynamo for Revit 2.17 Upgrade – Part 1

    Introduction

    Navigating through the intricate world of Dynamo, it is crucial to stay updated on its continuous enhancements and refinements. In this part, the first of a series dedicated to Dynamo updates, we’ll delve into six (6) user-centric new features and enhancements aimed at enriching the user experience and broadening the horizon of what is possible with visual programming.

    This blog aims to nurture curiosity about Dynamo, encouraging the reader to explore its capabilities and experience with its features.

    In this part 1, we will discuss the Six (6) New features and enhancements.

    • Enhanced Node Autocomplete
    • New Dynamo settings with Import/Export and Deployment
    • In-Product Node Documentation
    • Insert Graph into an Open Workspace
    • Enhanced 3D Node Preview in Dynamo
    • Improving Workspace Organization with Advanced Grouping

    Each of these enhancements is designed to cater to different aspects of the Dynamo experience, whether you are an architect, engineer, designer or a passionate Dynamo enthusiast, these improvements have the potential to elevate productivity and deliver more efficient BIM projects, saving valuable time.

    Enhanced Note Autocomplete – Smart Recommended Nodes

    Feature Overview

    The world of visual programming is continually evolving, equipping developers with more refined tools and functionalities. Among the recent enhancements in Dynamo is the “Recommended Nodes” feature in Node Autocomplete.

    Dynamo’s Node Autocomplete, once enabled, now features a “Recommended Nodes” enhancement driven by machine learning. This improvement provides more relevant node suggestions based on Confidence Level. Suggestions are derived from extensive training on real-word Dynamo patterns. Users have the flexibility with Low Confidence suggestions can easily switch suggestions methods.

    A Deeper Dive

    • Introducing the “Recommended Nodes” Feature in Node Autocomplete

    Dynamo’s Node Autocomplete has been enhanced with a significant feature: the “Recommended Nodes”. This feature, driven by advanced machine learning, it offers precise node suggestions to optimize the visual programming workflow.

    • What is “Confidence Level” for Precision in Suggestions?

    Once the Node Autocomplete is enabled in the Preferences, it can be activated by double-clicking on an Upstream or Downstream node port in the graph. the Autocomplete node ranks suggestions to ensure the most relevant and appropriate connections are prioritised. Each suggested node is assigned a Confidence Level, reflecting the algorithm’s certainty about its relevance and suitability within the given context. A higher confidence rating (percentage) prioritises nodes that are more pertinent, further prioritising the design process.

    • What are node rankings and suggestions from Real-World Learning?

    The node rankings and suggestions are derived from the algorithm’s extensive training on the Dynamo dictionary, Dynamo host samples, and real Dynamo graphs. By understanding real-world patterns, it can make informed recommendations. As a result, the Autocomplete node offers customised and reliable suggestions, that can significantly improve the visual programming experience in Dynamo.

    • What is “Low Confidence” nodes?

    Nodes assigned a lower ranking percentage are considered nodes that the algorithm have less confidence in their usability/match with the selected port and are conveniently categorized under “Low Confidence”. They are available for optional selection, ensuring flexibility in node choices. The criteria for which nodes fall under “Low Confidence” can be adjusted.

    • How to swiftly alternate between the Ranking Methods?

    Regardless of the Preferences settings, users can effortlessly switch between the Recommended Nodes and the previously existing Node Type Match method directly from within the Autocomplete node. This ensures a seamless workflow, eliminating the need to delve into separate settings or menus.

    Enabling Node Autocomplete – Step-by-Step

    1. From the Dynamo tab, select Preferences.

    Dynamo

    1. Under Features, locate the Node Autocomplete option and expand it.
    2. Toggle the switch to ‘On‘ to the left of Enable Node Autocomplete.

    Dynamo

    1. Select the Default Ranking Method
    2. Type the number of nodes that will show in the Autocomplete node
    3. Toggle the switch for Hide nodes below a specified confidence level to ‘On
    4. Close the Preferences Panel

    How to Select nodes from the high-ranking List – Video

    Beginning with a single node:

    • Autocomplete node is initiated by double clicking on one of the node’s input ports
    • Top ranked node is selected from the list
    • This process is repeated for the other ports

    How to Select nodes from Low Confidence list – Video 

    Beginning with a single node:  

    • Autocomplete node is initiated by double clicking on the Category input port of the All Elements of Category node. 
    • The top ranked Category.ByName node is selected from the list and automatically connected 
    • Autocomplete node is initiated by double clicking on the Name port of the Category.ByName 
    • The String node is selected from the Low Confidence list and automatically connected 

    Feature summary 

    The introduction of the “Recommended Nodes” feature, enhances the functionality of Dynamo’s Node Autocomplete. Utilising machine learning and data from real-world usage patterns, this user-centric enhancement allows users to create graphs with greater efficiency. With the added flexibility to feature aims to provide ore relevant and reliable node suggestions. Alongside the ability to adjust confidence criteria and switch suggestion methods, users have tools at their disposal to refine their visual programming experience. 

    1. New Dynamo setting with import/export and deployment. 

    Feature Overview 

    In the vast spectrum of visual programming tools provided by Dynamo, the ability of exporting and importing settings using XML files stands as another practical addition, accessible right from the Preferences panel. This feature not only facilitates the sharing, deployment, and transfer of preferences, but also serves as an efficient backup mechanism. Ensuring consistency in Dynamo settings across the company, it provides a safeguard against unintended changes and streamlines collaboration efforts. 

    Exporting Settings in Dynamo from the Preferences Panel – Step-by-Step 

    Note: Before making changes or importing existing preferences, exporting current configurations to an XML file is a prudent step. This acts as a backup, allowing importing them back if needed.   

    1. From the Dynamo tab, select Preferences.
    2. In the “Preferences” dialog box, click on the section (that contains the specific settings to export. 
    3. Expand Subsections: Expand subsections to reveal the individual preferences. 
    1. Review and Set Preferences: Review the individual preferences and ensure they are set according to your desired configurations. 
    1. Export Settings: Once you have reviewed and set all the preferences you want to export, click on “Export” within the “Preferences” panel to initiate the export process. 
    1. Choose Export Location: A file explorer window will appear, allowing you to choose a location for saving the exported settings file. 
    1. Rename File: The first exported settings file to that location, will be automatically named “DynamoSettings.XML”, otherwise the file of the being exported will have a suffix appended to it (i.e. DynamoSettings_12345678.XML). Renaming the exported file or adding/replacing the suffix will help identify the settings later. 
    1. Close File Explorer Window: After providing the file name and selecting the export location, close the file explorer window. 

    The exported XML file will contain the chosen configurations and can be used later to import the settings into Dynamo or share them with others who might benefit from the same configurations. 

    Importing Preferences – Step-by-Step

    Weather reapplying exported settings, deploying them across multiple instances or incorporating received ones from another user, the effort is minimal. Simply use the Import tool in the Preferences panel to integrate them.

    1. From the Dynamo tab, select Preferences.
    2. In the “Preferences” dialog box, click on Import
    3. Locate the XML file: Locate and select the XML file that contain the configurations you want to apply and select it
    4. Import Success? Click OK

    With these few steps, the settings in the Preferences panel will update to reflect the ones imported thru the chosen XML file.

    For settings outside the Preferences panel in Dynamo, it is necessary to restart both Dynamo and its host program for the settings to take effect.

    Deployment with XML files

    Using XML files for transferring preferences, offers a structured method for sharing, transferring, or reverting settings in Dynamo. It supports uniformity, collaboration, and quick settings adjustments.

    How to Export and Import Settings – Videos

    Here are two short videos that demonstrate how to export and import setting using XML files:

    1. The Node Autocomplete feature is enabled, and the Auto-Backup Interval time is modified
    2. The preferences settings are exported to an XML file that is renamed

    The preferences settings are exported to an XML file that is renamed

    • An existing XML Dynamo settings file is imported in which the Node Autocomplete feature was disabled, and the Auto-Backup Interval was set to 1 minute

    Feature Summary

    Utilizing XML files, Dynamo’s export and import tools offer a straightforward approach to managing configurations, remaining a user-centric environment by enabling users to both preserve and modify their setup.

    In-Product Node Documentation

    Feature Overview

    Dynamo’s revamped Documentation Browser simplifies node understanding with improved in-product node documentation. The Documentation Browser Accessed by right clicking a node and selecting Help…, it organizes information into three main parts: Node Information, Inputs and Outputs and Node Issue Help when things don’t go as planned.

    A feature familiar to many, the Documentation Browser is Dynamo’s in-product node documentation designed to give users quick access to node details without leaving the application. It is now reimagined and refined to provide more organized and detailed per-node documentation.

    Feature Details

    The Documentation Browser is now segmented in 3 sections:

    1. Node Information: This section provides information about the selected node. While the aim is to offer clarity on a node’s functionality, some nodes have In Depth information.
    2. Input and Outputs: This section presents a breakdown of the nodes inputs and outputs complete with their type, a brief description, Inputs Default Value and Outputs Data type.
    3. Node Issue Help: This section appears only when a node error is detected. It is intended to offer guidance to address the error.

    The enhanced in-product node documentation provides structure and efficient way for users to access and understand vital information. This streamlined approach addresses the fundamental need for clarity and accessibility in Dynamo’s complex environment.

    In-Product Node Documentation – How it Works – Video

    Showcasing the improved in-product node documentation within Dynamo offers just a glimpse. It is recommended to dive into the improved documentation firsthand, allowing for a richer understanding of its advancements and nuances.

    Insert Graph into an Open Workspace

    Feature Overview

    Dynamo’s “Insert” tool, amplifies the modular assembly approach in visual programming., by streamlining the integration of graphs within graphs or within empty workspace. This enhancement ensures a boost in workflows efficiency, reusability, modularity, and clarity within the Dynamo ecosystem.

    The optimization of the user experience in Dynamo is enhanced by the “insert” tool. While copy-pasting graphs served as a functional method, this new tool provides an elegant, integrated, and straightforward approach for optimizing the workflow even further.

    Feature Benefits

    • Precision: Minimize manual errors and ensure that graphs are integrated correctly
    • Efficiency: Speed up the process by bypassing the older copy-paste approach.
    • Streamlined workflow: This tool’s introduction fits seamlessly with established workflows, simplifying the integration/nesting process.
    • Enhanced Collaboration: Ensures that graphs to be nested maintain their functionality and integrity when shared among different users

    Workflow enhancements

    This functionality goes beyond nesting graphs, it reshapes how professionals approach their graphs creation in Dynamo. While enabling efficient integration, it offers:

    • Modular approach: Emphasizes the discrete unit of design, promoting a design as you go approach and encouraging decomposing complex tasks into distinct graphs and seamlessly stitch them together in one file as needed.
    • Reuse & Recycle: Once a graph is created, it can be reused repeatedly across different multiple projects, maximizing efficiency.
    • Maintained Clarity: It promotes preserving a tidy and organized library that is ready for integration.

    Inserting a Graph into an Open Workspace – Step-by-Step

    The introduction of the “Insert” graph tool in Dynamo, elevates the visual programming experience of both novices and seasoned users, fostering better organization and collaboration leading to an increased efficiency.

    1. Start a new graph or open an existing one in the workspace.
    2. Navigate to the File tab and select Insert.
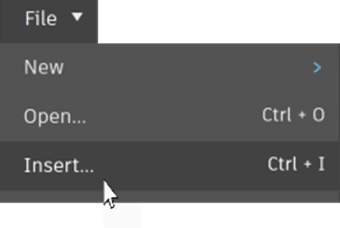
    Dynamo-for-Revit

    1. Locate the graph you want to insert and select it. (Note: If the graph is inserted in an existing graph, it will be located below it)
    1. Review and connect the newly added graph as desired.

    Feature Demonstration – Video

    Like other tools in this version, this tool has also to be experienced firsthand.

    In this demonstration 2 graphs will be inserted in a new file, and stich together to export door’s data from a Revit project to an Excel file.

    Enhanced 3D Node Preview in Dynamo

    Feature Overview

    Dynamo’s 3D Watch node ensures the geometry remains in sight, even when the connected node preview is turned off. This feature provides an uninterrupted spatial understanding without distractions

    In certain cases, there may be no need to toggle node preview of a node on just to see the spatial context. Watch 3D now shows geometry for all directly connected nodes, even if their preview is turned off. With this update designers can remain immersed in their workflows while still retaining visual clarity.

    How it Works – Step-by-Step

    1. Right click the node connected to the 3D Watch node and uncheck Geometry Preview.
    2. Run the graph. The geometry will stay visible in the 3D Watch Node after the graph.

    This enhancement is not merely a technical update; it is a thoughtful design decision. It acknowledges the core principle that visual continuity is a must in spatial design tools like Dynamo.

    How it Works – Video

    In this demonstration the Geometry Preview is turned off in the GeometryColor.ByGeometryColor node. After the graph is run, the color disappears in the background but remains in the 3D Watch node.

    Improving Workspace Organisation with Advanced Grouping

    Feature Overview

    Another enhancement in Dynamo is group functionalities. Custom Group styles, resizable headers, intuitive color adjustments, various customization option, together with the added convenience of dragging nodes into groups and, removing them using Alt+Left Click, makes organising the workspace a more intuitive endeavor. Additionally with settings exportable from within the Preferences panel, sharing. Backup, or deployment becomes smoother and more consistent.

    Feature Details

    • Resizable Headers: Customize to content’s needs. Adjust the headers size for better readability or a neater visual look.
    • Automatic Text Color Adjustment: Dynamo toggles between black and white text based on group’s background color, ensuring readability.
    • Direct Access, Drag & Drop and Easy Removal:
      • Quick Style Change: While Styles are created and set in the Preferences panel, Adjustments like color and font size are just a click away with the context menu.
      • Direct Node Organisation: Dragging a node straight into a group for swift organisation.
      • Easy Node Removal: Removing a node from a group is made easy using Alt+Left Click.
    • Exporting Settings Via Preferences: Groups Styles Settings can be backed up, shared and deployed by using the Export tool in the preferences panel. Consistency is ensured across teams and projects.

    Why it Matters

    The enhanced grouping functionality in Dynamo emphasize:

    Efficiency: With intuitive nodes organisation, direct style customization and easily readable group labels, workflows become faster and smoother.

    Collaboration: he ability to export and share settings ensures that teams work with a consistent visual framework, enhancing collaborative effort

    Personalization: With a wide range of customisation options, Dynamo allows users to create a workspace that reflects their styles and project needs.

    Dynamo’s advanced grouping features in this update increase clarity and efficiency, adapting as workflows grow in complexity. The result is potentially a better organised, efficient, and customized visual programming environment.

    How it Works – Video

    In this demonstration, a new Group Style is created and applied to a group and text size is changed.

    Part 1 Conclusion

    The six Dynamo enhancements we explored in this blog are clearly geared towards refining the user experience a boosting efficiency in visual programming. From Node Autocomplete to the revamped group functionalities, each feature aims to empower design professionals even further.

    Keep an eye for the part II of this Dynamo for Revit 2.17 series where we’ll keep spotlighting more of Dynamo’s updates throughout. Until next time!

    For any questions reach out to your sales rep or contact us at info@solidcad.ca
    Promo d’automne Matterport

    null

    Promo d'automne Matterport

    Offre à durée limitée : 1er octobre – 31 octobre 2023

    Découvrez les dernières promotions sur les caméras de haute qualité, les abonnements et les services des scanners Matterport et faites de bonnes affaires dès aujourd’hui !

    Achetez le Scaner Matterport PRO 3 / PRO 2 et bénéficiez de 20% de réduction sur un abonnement annuel au plan Professional 50
    ou à un plan supérieur*.

    Dépêchez-vous, l’offre est valable jusqu’au 31 octobre 2023.

    Conditions générales d’utilisation

    Promotion SaaS pour le plan professionnel 50 ou supérieur:

    • Cette promotion s’applique exclusivement aux nouveaux clients de Matterport qui achètent une caméra Matterport PRO 3 / PRO 2.
    • Il s’agit d’un abonnement spécifique pour un plan d’abonnement annuel Professional 50 ou plus.

    Achat du produit:

    Lors de l’achat d’un Matterport PRO 3 / PRO 2, vous recevrez un e-mail de confirmation de votre commande. Cet email vous guidera également sur les étapes à suivre pour l’achat du Matterport Cloud Plan.

    Contactez-Nous Maintenant

    null

    AutoCAD – Editing with Groups & Layers

    AutoCAD – Editing with Groups & Layers 

    Trying to edit geometry that is overlapping or right next to multiple objects can sometimes be challenging. 

    We can simplify the process by doing the following: 

    • Lock the layers of the geometry we don’t want to modify
      Any object that is part of a locked layer cannot be modified (move, copy, delete, etc.)
       
    • Group together different objects, blocks, geometry, etc.
      Grouped geometry becomes one single object that is easier to manipulate


    ]For any questions reach out to your sales rep or contact us at info@solidcad.ca 

    Fusion 360 3 for 2 Promo

    null

    Offre à durée limitée!

    Économisez 33% sur les offres groupées Fusion 360
    Promotion Fusion 360 3 pour 2 – Offre à durée limitée!

    Les clients peuvent bénéficier d’une réduction de 33.34% sur l’achat de lots de (3) trois nouveaux abonnements d’un an à Fusion 360 achetés en même temps.

    Faites vite, l’offre se termine le 31 janvier 2024

    Les réductions seront reflétées dans toutes les listes de prix mondiales. Tous les pays (à l’exception de la Chine) peuvent acheter via le réseau des revendeurs. Cette promotion est une offre mondiale, elle figure sur toutes les listes de prix (à l’exception de la Chine) et est disponible partout. La promotion Fusion 360 est actuellement disponible à l’achat.

    La promotion est disponible jusqu’au 31 janvier 2024. La remise de 33,34 % s’applique aux forfaits Fusion 360 de (3) trois nouveaux abonnements d’un an.

    AUTODESK SE RESERVE LE DROIT D’ANNULER, DE SUSPENDRE OU DE MODIFIER UNE PARTIE OU L’ENSEMBLE DE CES PROMOTIONS, A TOUT MOMENT ET SANS PREAVIS, QUELLE QU’EN SOIT LA RAISON ET A SA SEULE DISCRETION. LES PRIX DES LOGICIELS AUTODESK PEUVENT CHANGER.

    Autodesk et Fusion 360 sont des marques déposées d’Autodesk, Inc. et/ou de ses filiales et/ou sociétés affiliées aux États-Unis et/ou dans d’autres pays. Tous les autres noms de marques, de produits ou marques commerciales appartiennent à leurs propriétaires respectifs. Autodesk se réserve le droit de modifier à tout moment et sans préavis l’offre sur ses produits et ses services, les spécifications de produits, ainsi que ses tarifs. Autodesk ne saurait être tenue responsable des erreurs typographiques ou graphiques susceptibles d’apparaître dans ce document.

    Contact

    null

    AutoCAD and Civil 3D: New Tool for Migrating Files to Autodesk Docs

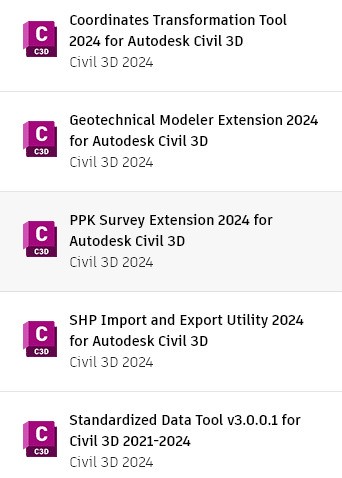
    Read until the end to see which extensions for Civil 3D are now available for download!

    If you use AutoCAD and especially Civil 3D and you use Autodesk Docs and the Autodesk Construction Cloud (ACC), then you should consider this tool.

    From the download site:

    “It provides guidance throughout the whole data migration process including data integrity checks, fixes, and uploading. It enables you to clean up data integrity issues so that the uploading process can be completed successfully and efficiently while keeping files as a single source of truth.”

    Interestingly, it is only available at the Autodesk App Store, but it is free.

    This tool will help fixe those pesky “Related Data” folders as it identifies potential errors before upload, and it provides a mechanism to repair them.

    Highly recommended.

    Civil 3D: 2024 Extensions Released

    For any questions reach out to your sales rep or contact us at info@solidcad.ca